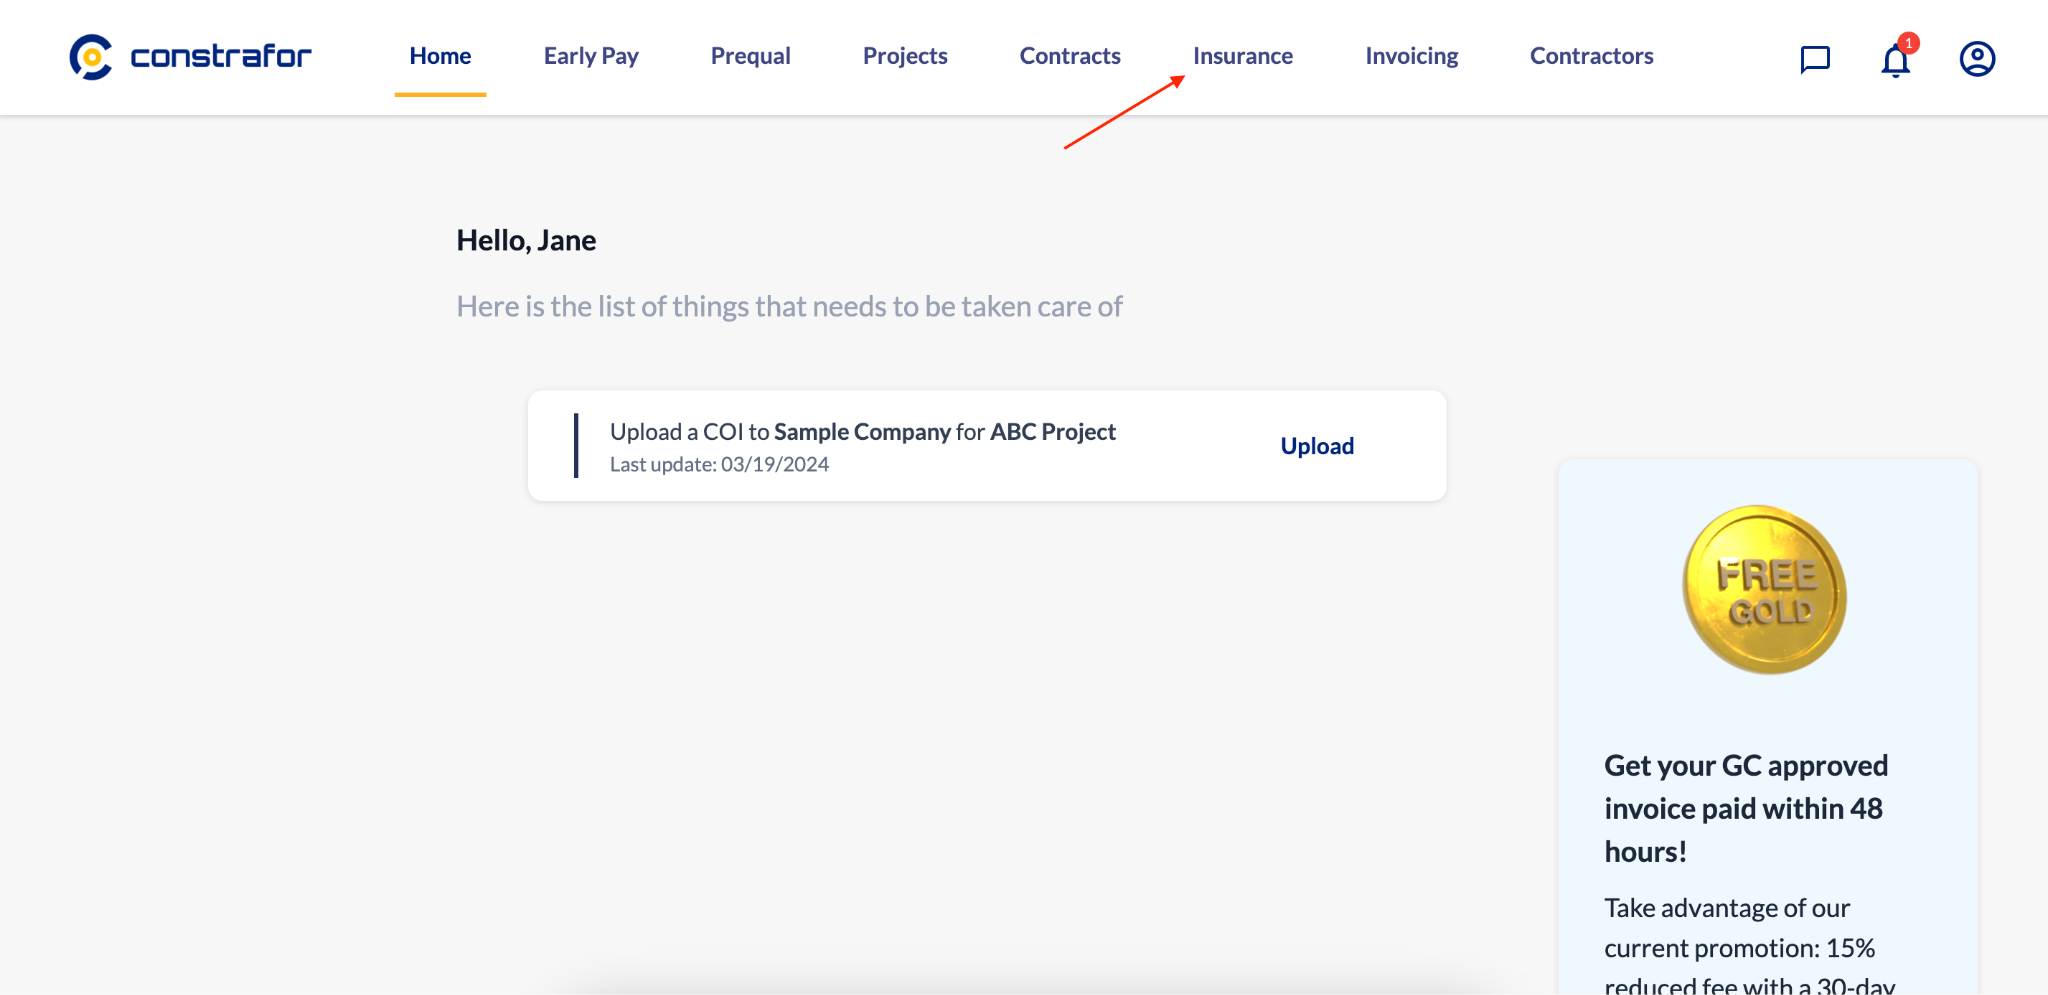
Step 1: Locate the insurance module
- You will find the insurance module located at the top of the screen
- You can also click on Upload, it will take you to the screen in step 3.
Step 2: Click on the project requiring a COI
-
You will see the COI status is still in the Required stage.
-
If you do not see the project appear as it is below, you can always upload the documents using the Upload documents button that will take you to the screen in the next step.

Step 3: Upload the COI
-
You can drag and drop or upload the COI from your computer.
-
If you clicked Upload Documents from the previous screen, simply select the project you’d like to upload a COI for from the drop-down menu.
-
You can also invite your insurance broker via email to upload a COI on your behalf by using the Add broker button.

Step 4: Click Submit
-
The Submit button the top right corner will be clickable.

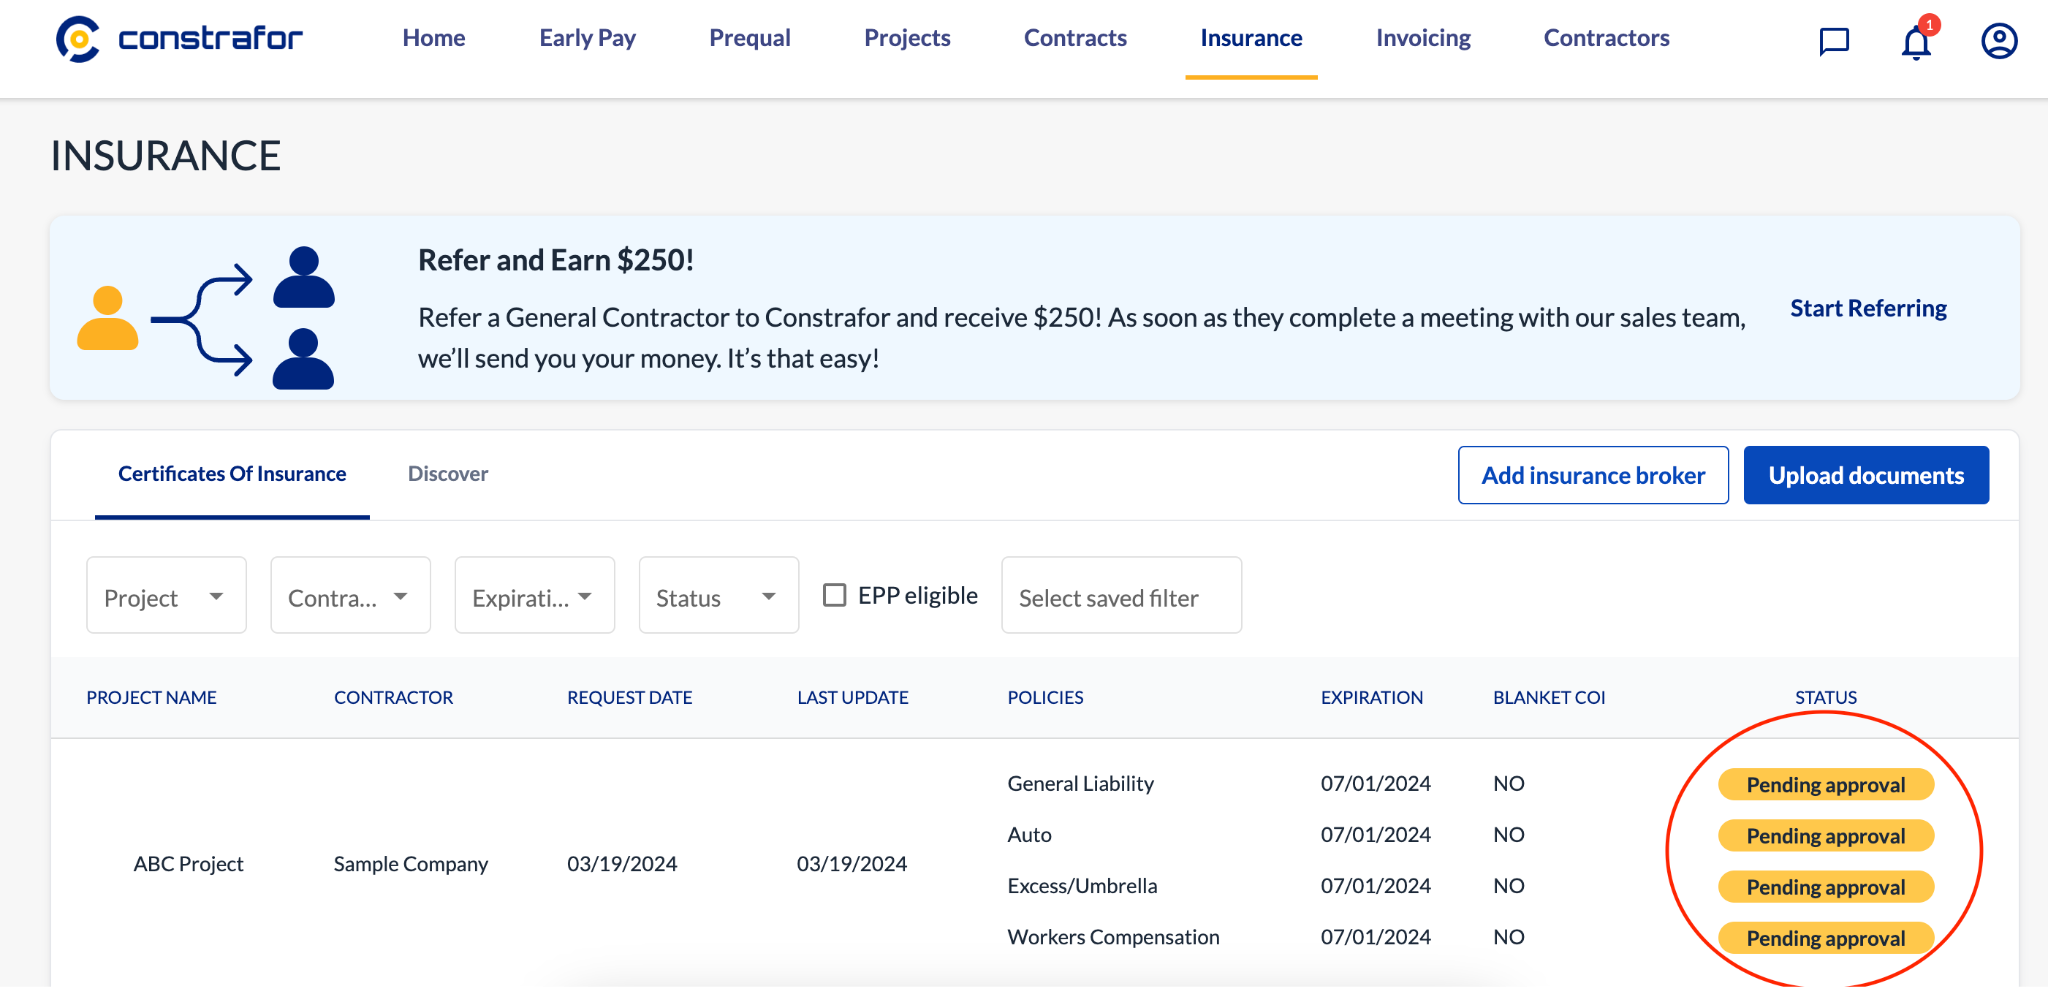
Step 5: Wait for GC approval
-
Your COI status has changed from Required to Pending Approval. Your GC will be notified and can approve the COI.